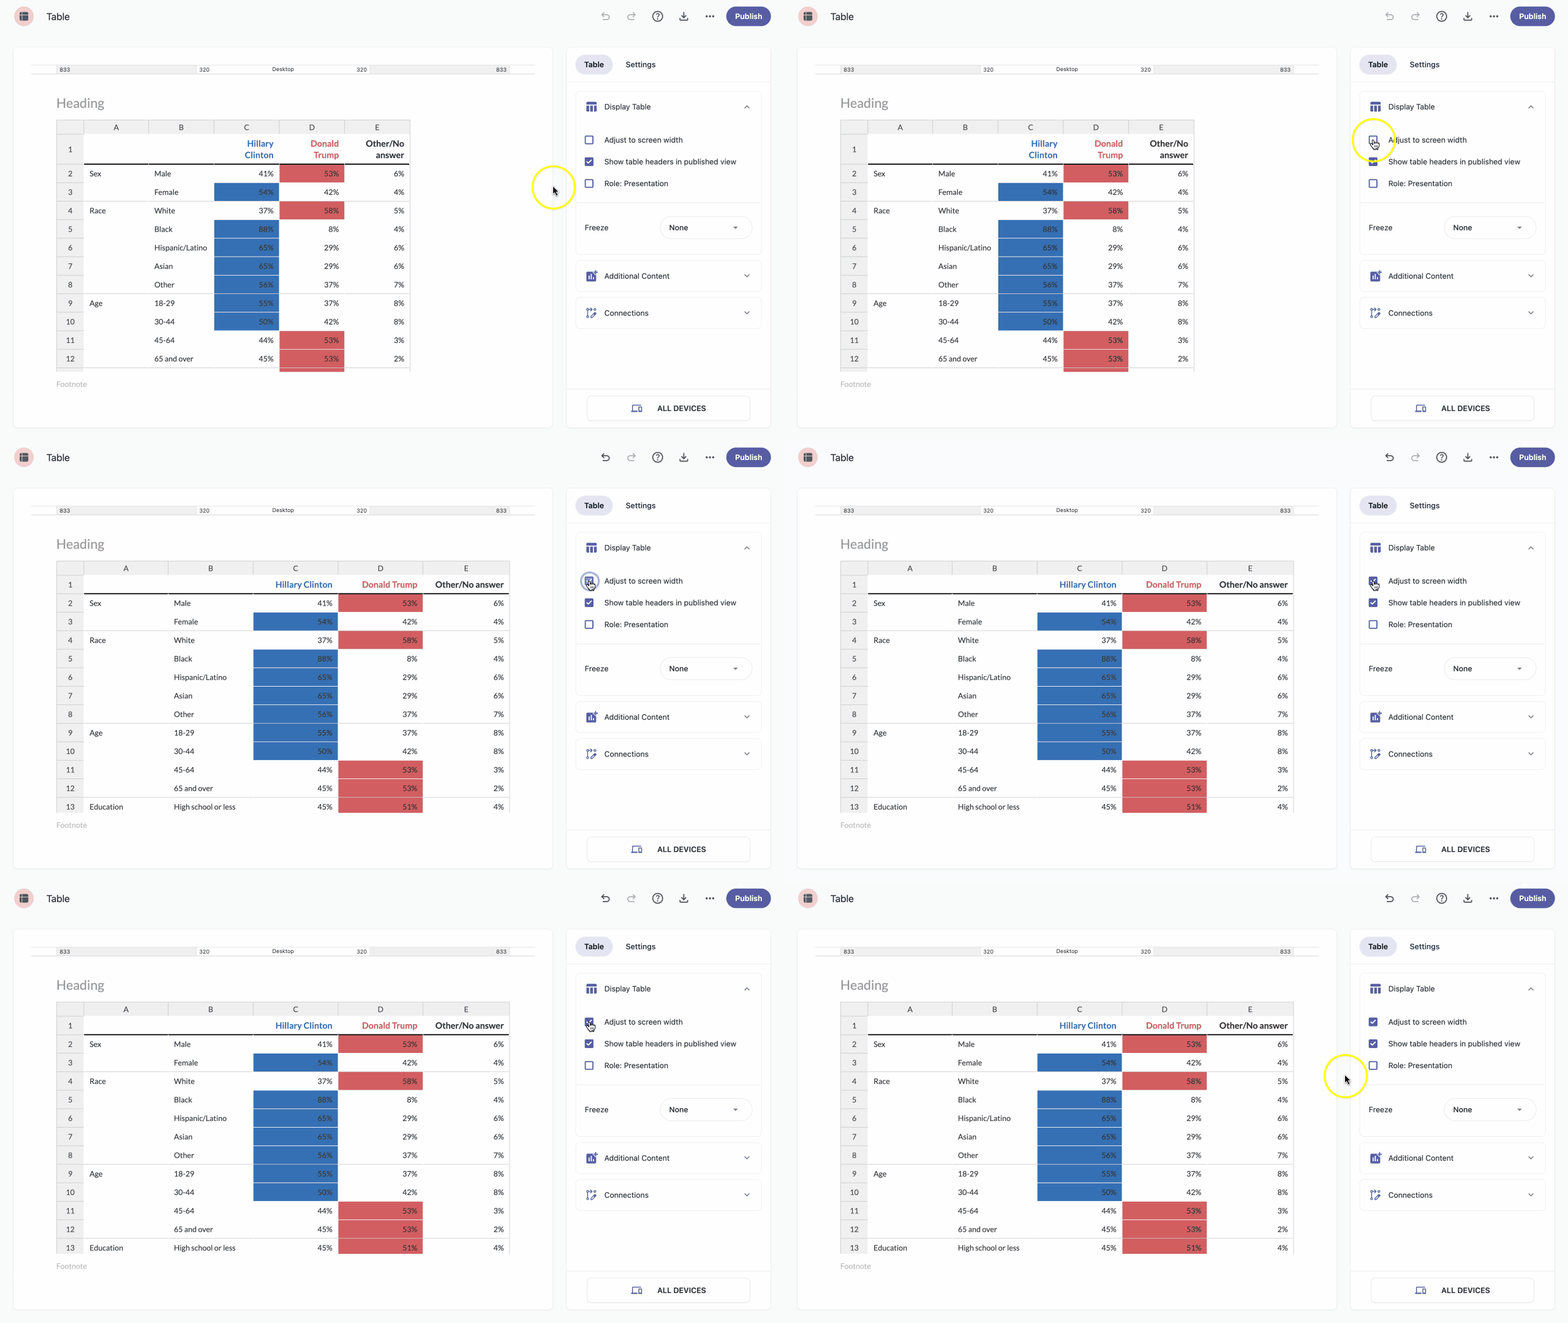
Adjust to screen width
The Adjust to screen width option makes your table responsive: columns stretch or shrink proportionally to fit the available width. Use it when a table doesn't quite fit the screen, and you'd rather not have your audience scroll horizontally.
- In the table panel, open the Display table dropdown.
- Enable the Adjust to screen width option.
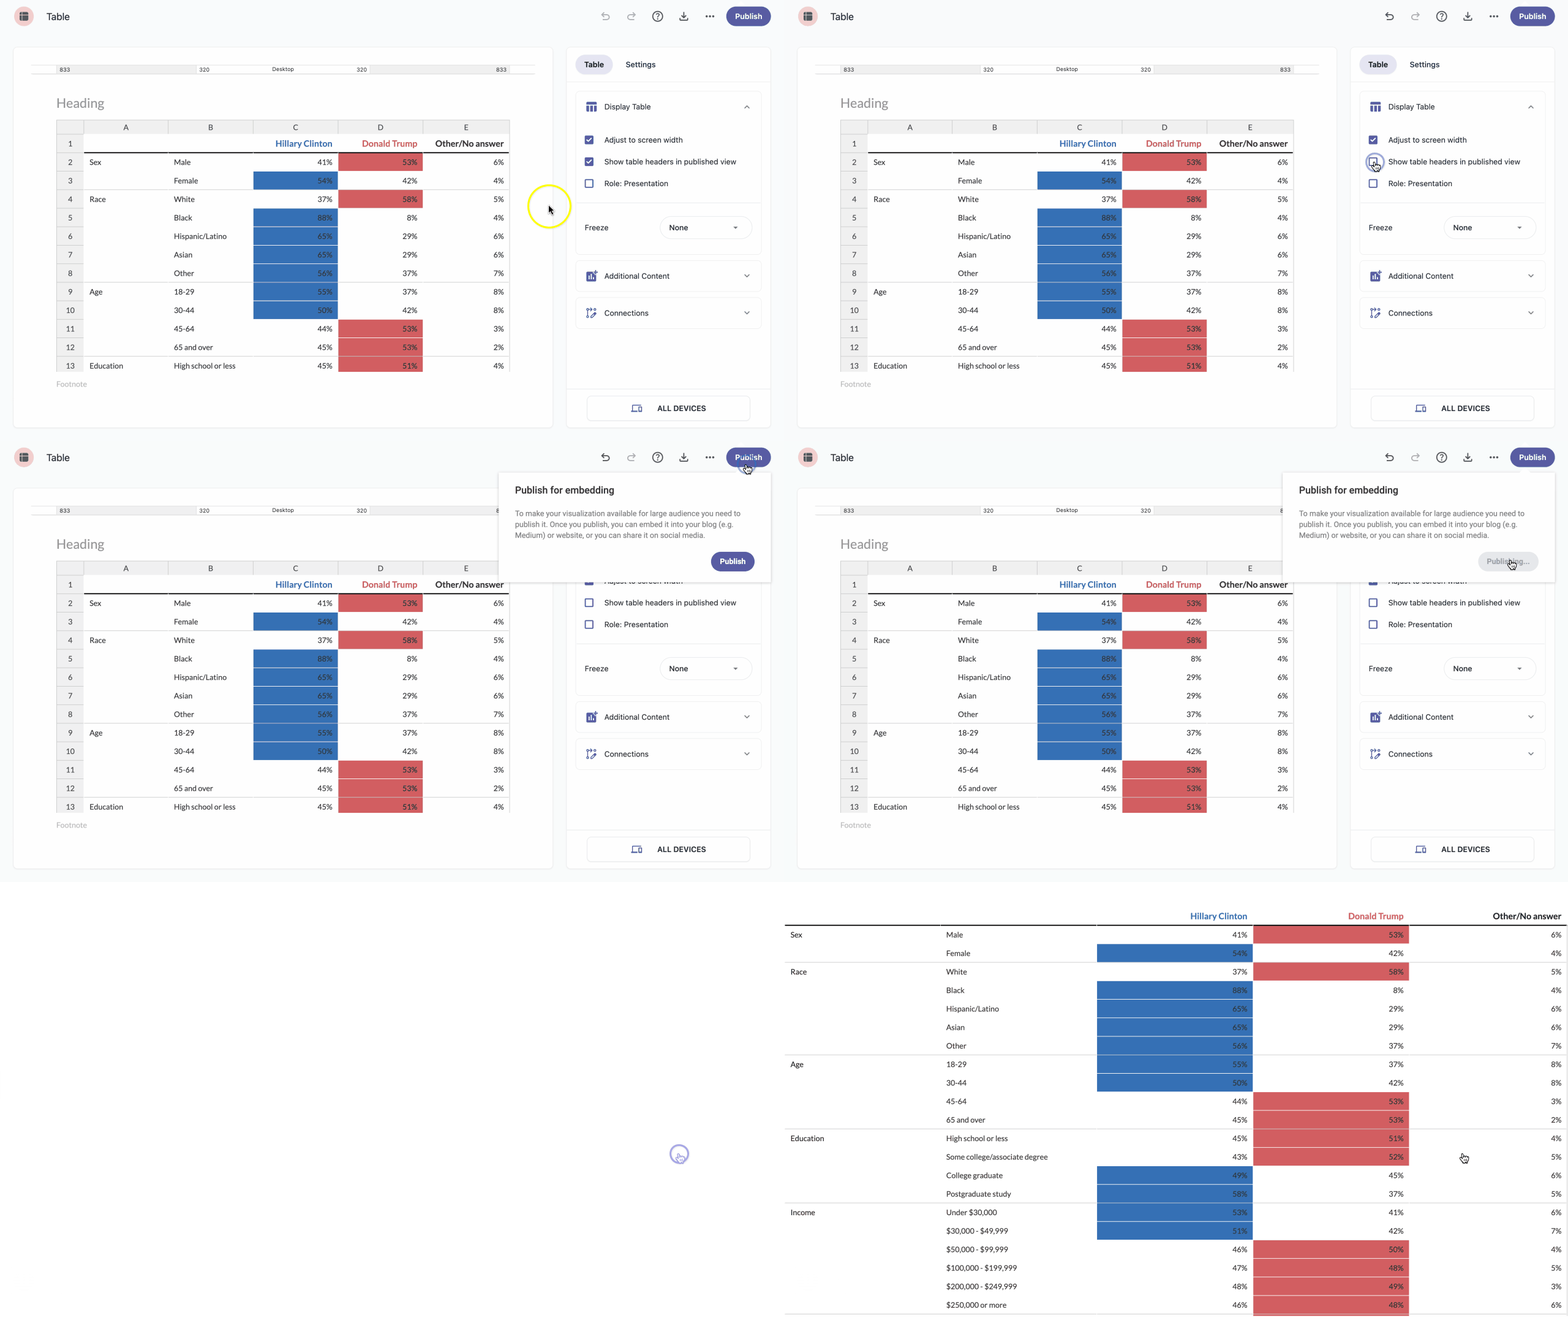
Show table headers in published view
Table headers appear in the editor by default to help you build the table. If you'd prefer a cleaner look in the published view, you can hide them.
- In the table panel, open the Display table dropdown.
- Disable the Show table headers in published view option.
Role: Presentation
The Role: Presentation option marks a table as decorative, so screen readers ignore its row and column structure. Enable it only when your table is used purely for visual layout and contains no data relationships to convey.
| Note: Leave this option off for data tables. Turning it on would prevent assistive technologies from announcing headers and cell relationships, making the data inaccessible. |
- In the table panel, open the Display table dropdown.
- Enable the Role: Presentation option.
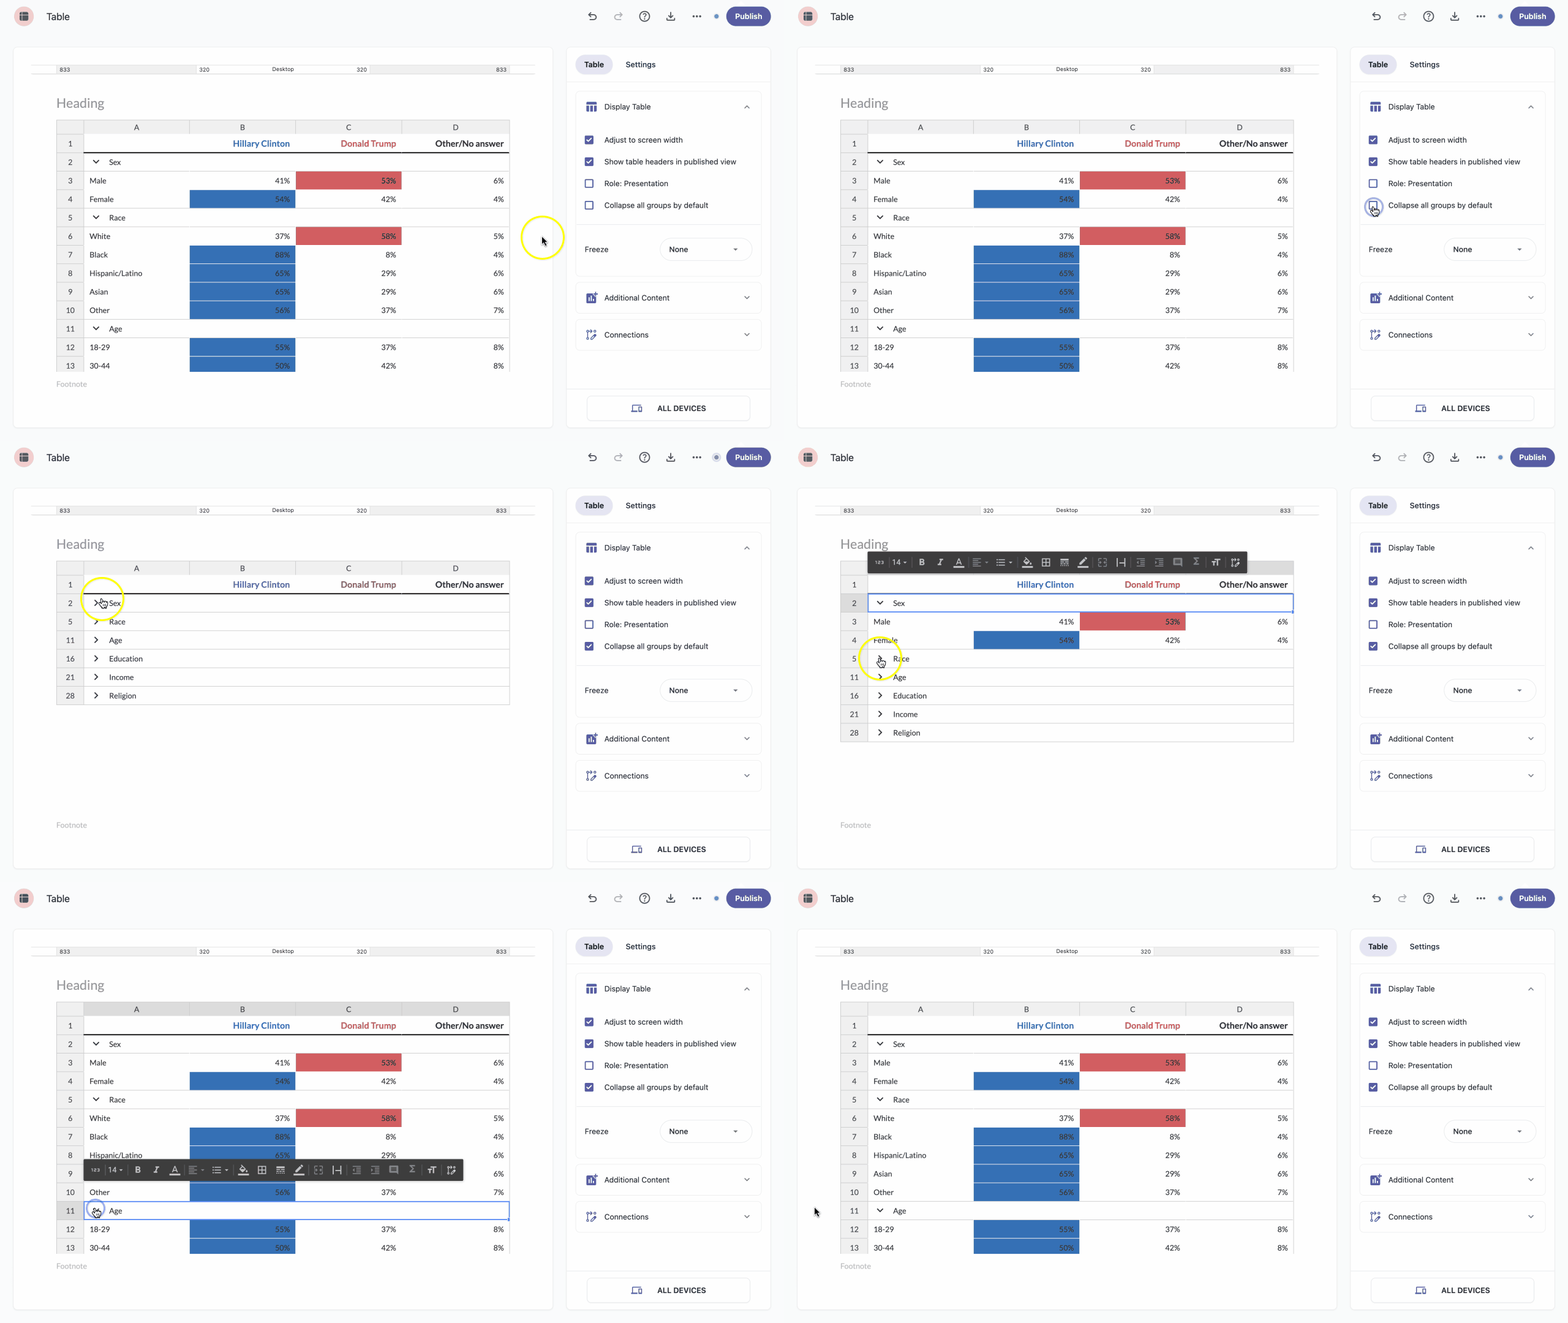
Collapse all groups by default
Collapse all groups by default to keep large tables compact and easier to scan. Your audience can expand groups one at a time to reveal the data inside.
- In the table panel, open the Display table dropdown.
- Enable the Collapse all groups by default option.
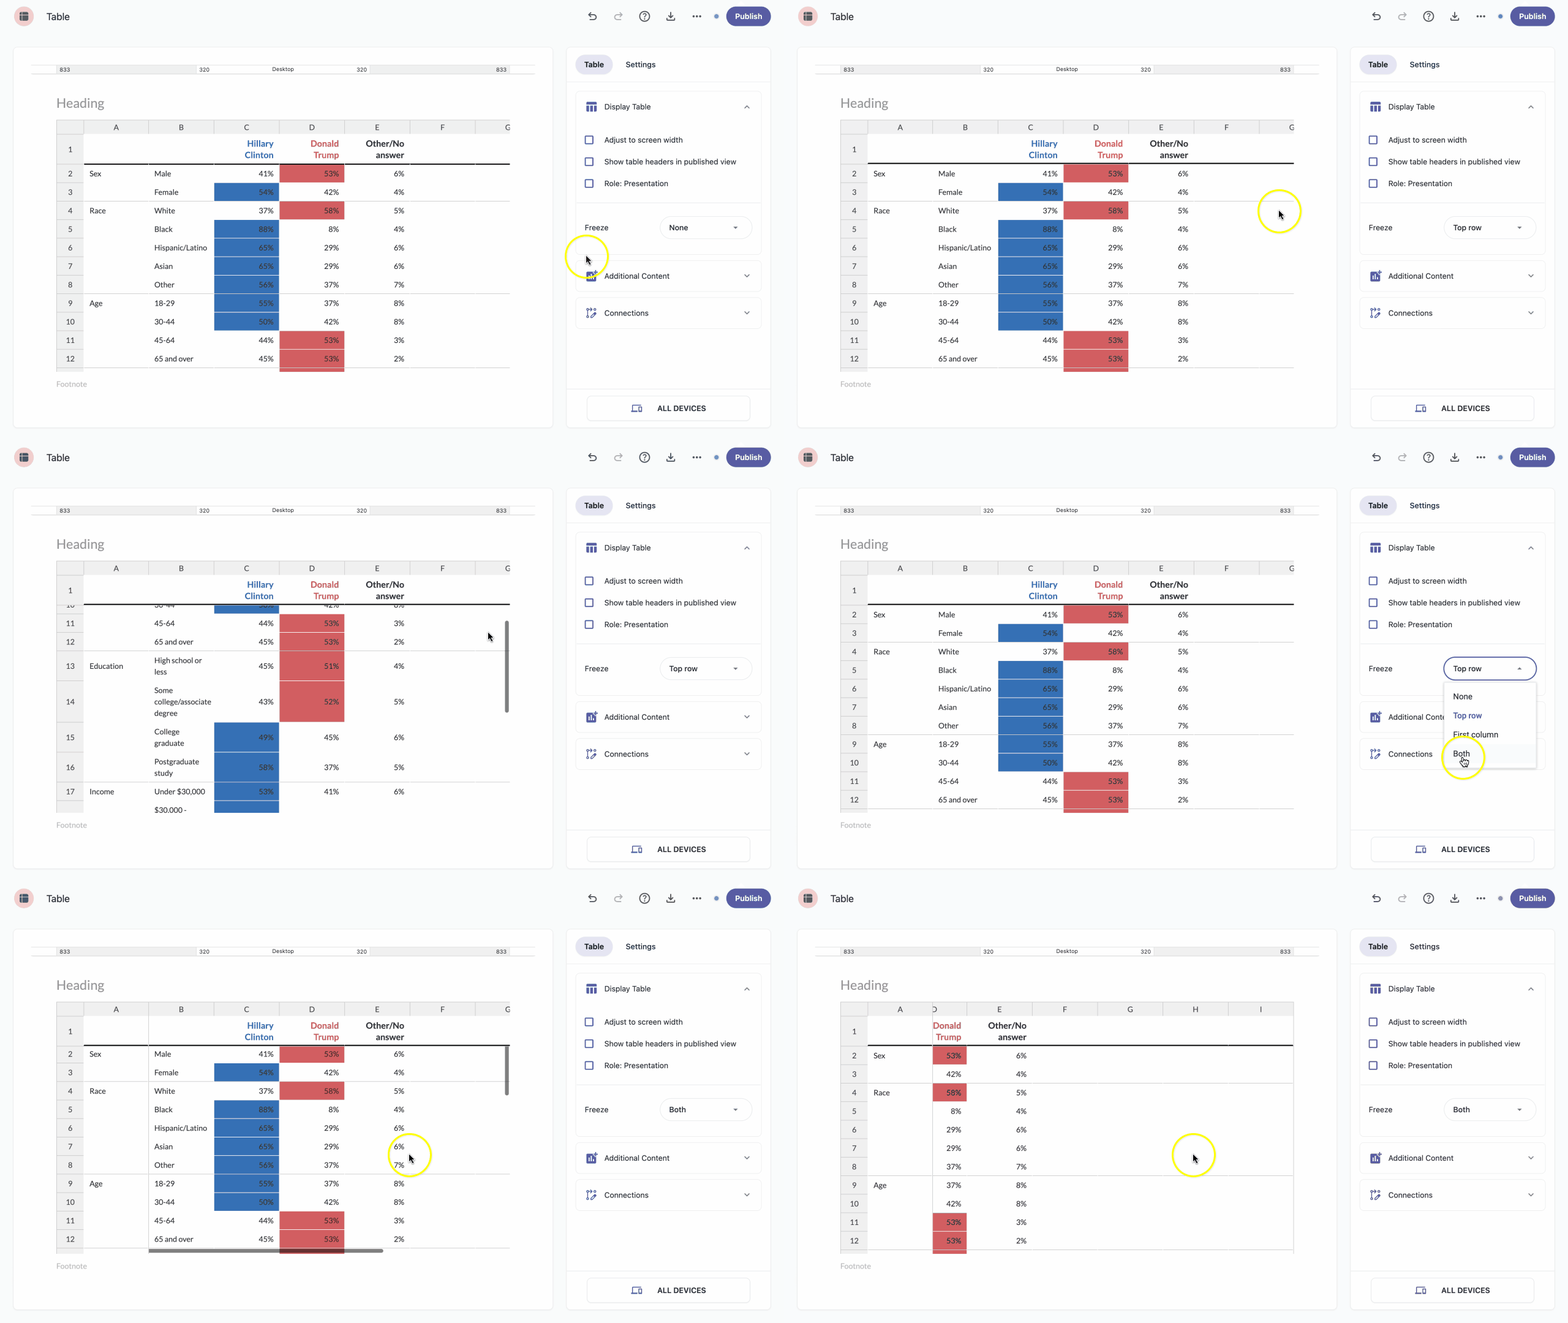
Freeze
Freezing the top row and leftmost column keeps your headers visible as you scroll through larger datasets, so you don't lose track of which value belongs where.
- In the table panel, open the Display table dropdown.
- Open the Freeze dropdown.
- Choose the option you want: Top row, First column, or Both.
| Note: To turn freezing off, choose None from the dropdown. |