Add data
- Click the blank cell where you want to add data.
- Type your data into the cell.
- When you move to another cell, your data will be saved automatically.
Format text
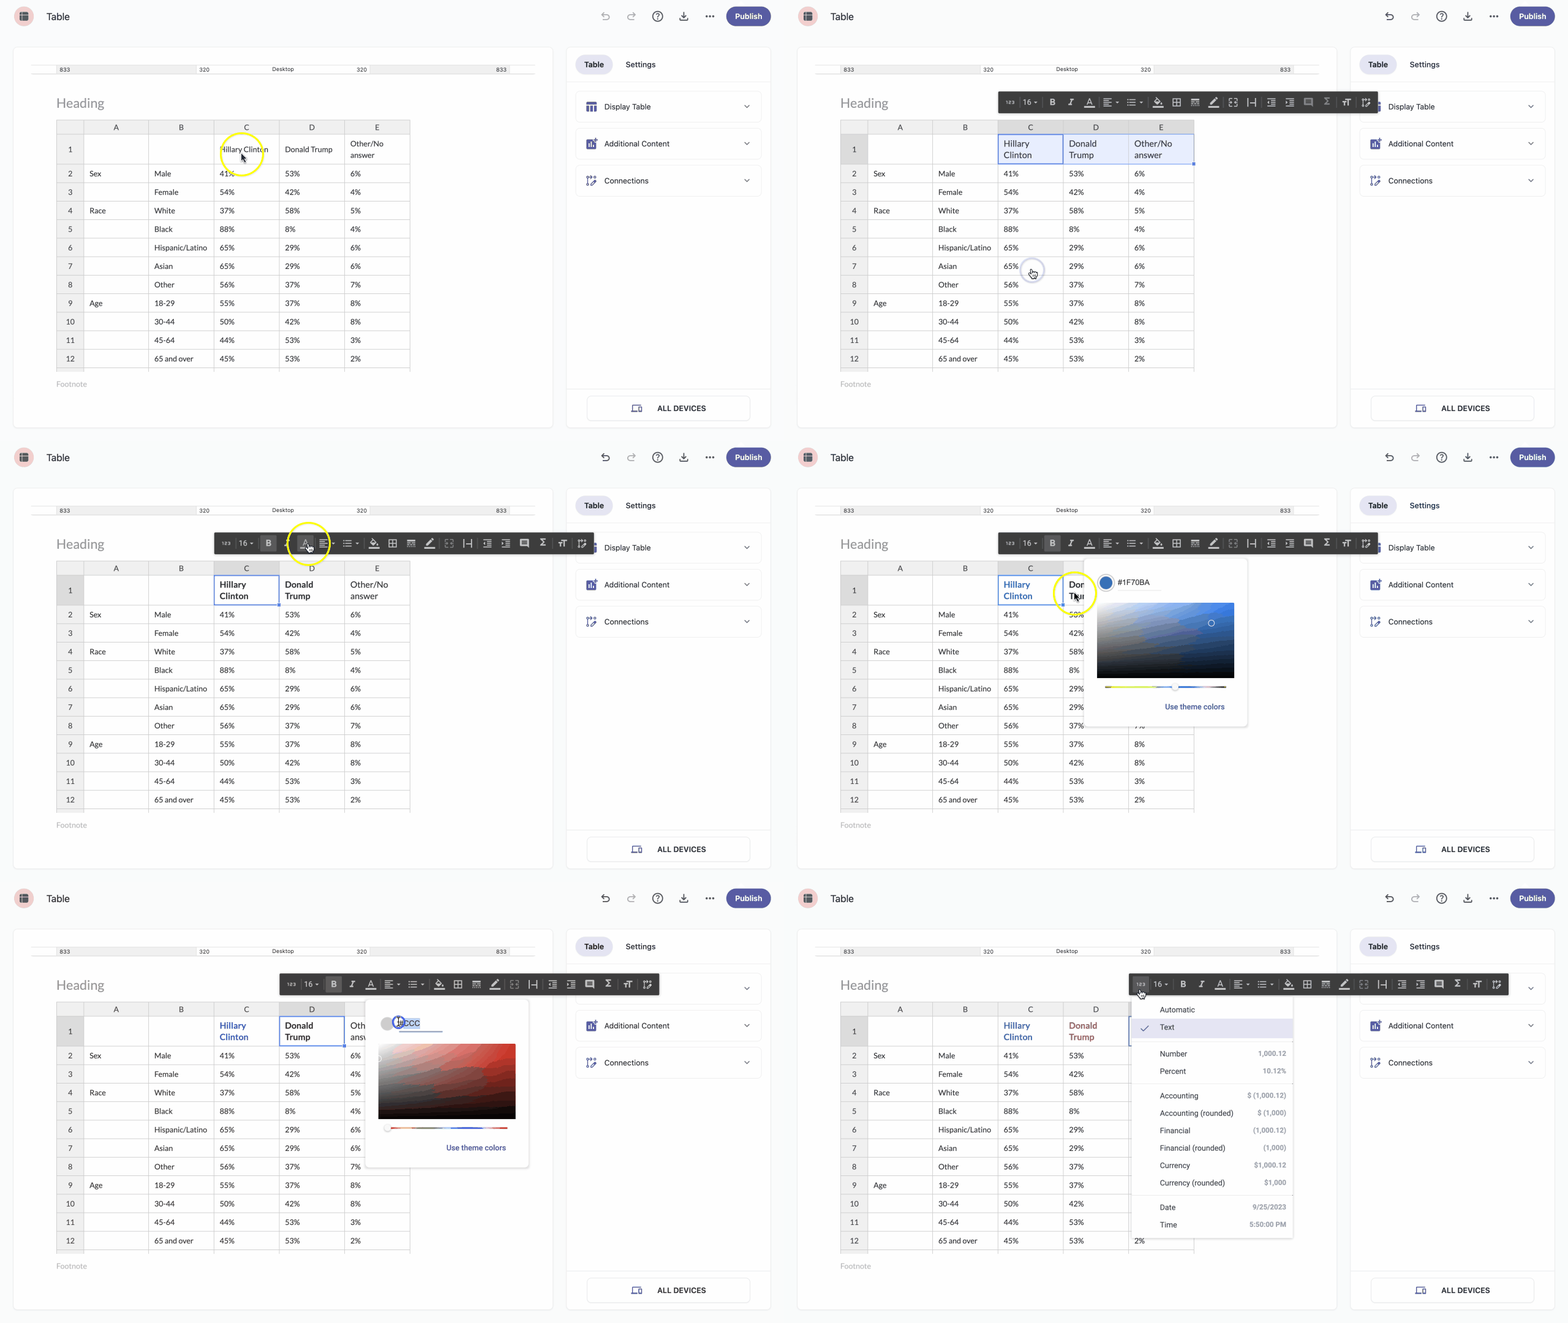
You can format text by changing the format, font size, and color, or by making it bold or italic.
- Select the data you want to edit.
- A toolbar will appear above the selected cell(s).
- Format the text in any way that works best for you. For more formatting options, click the 123 icon.
Align data
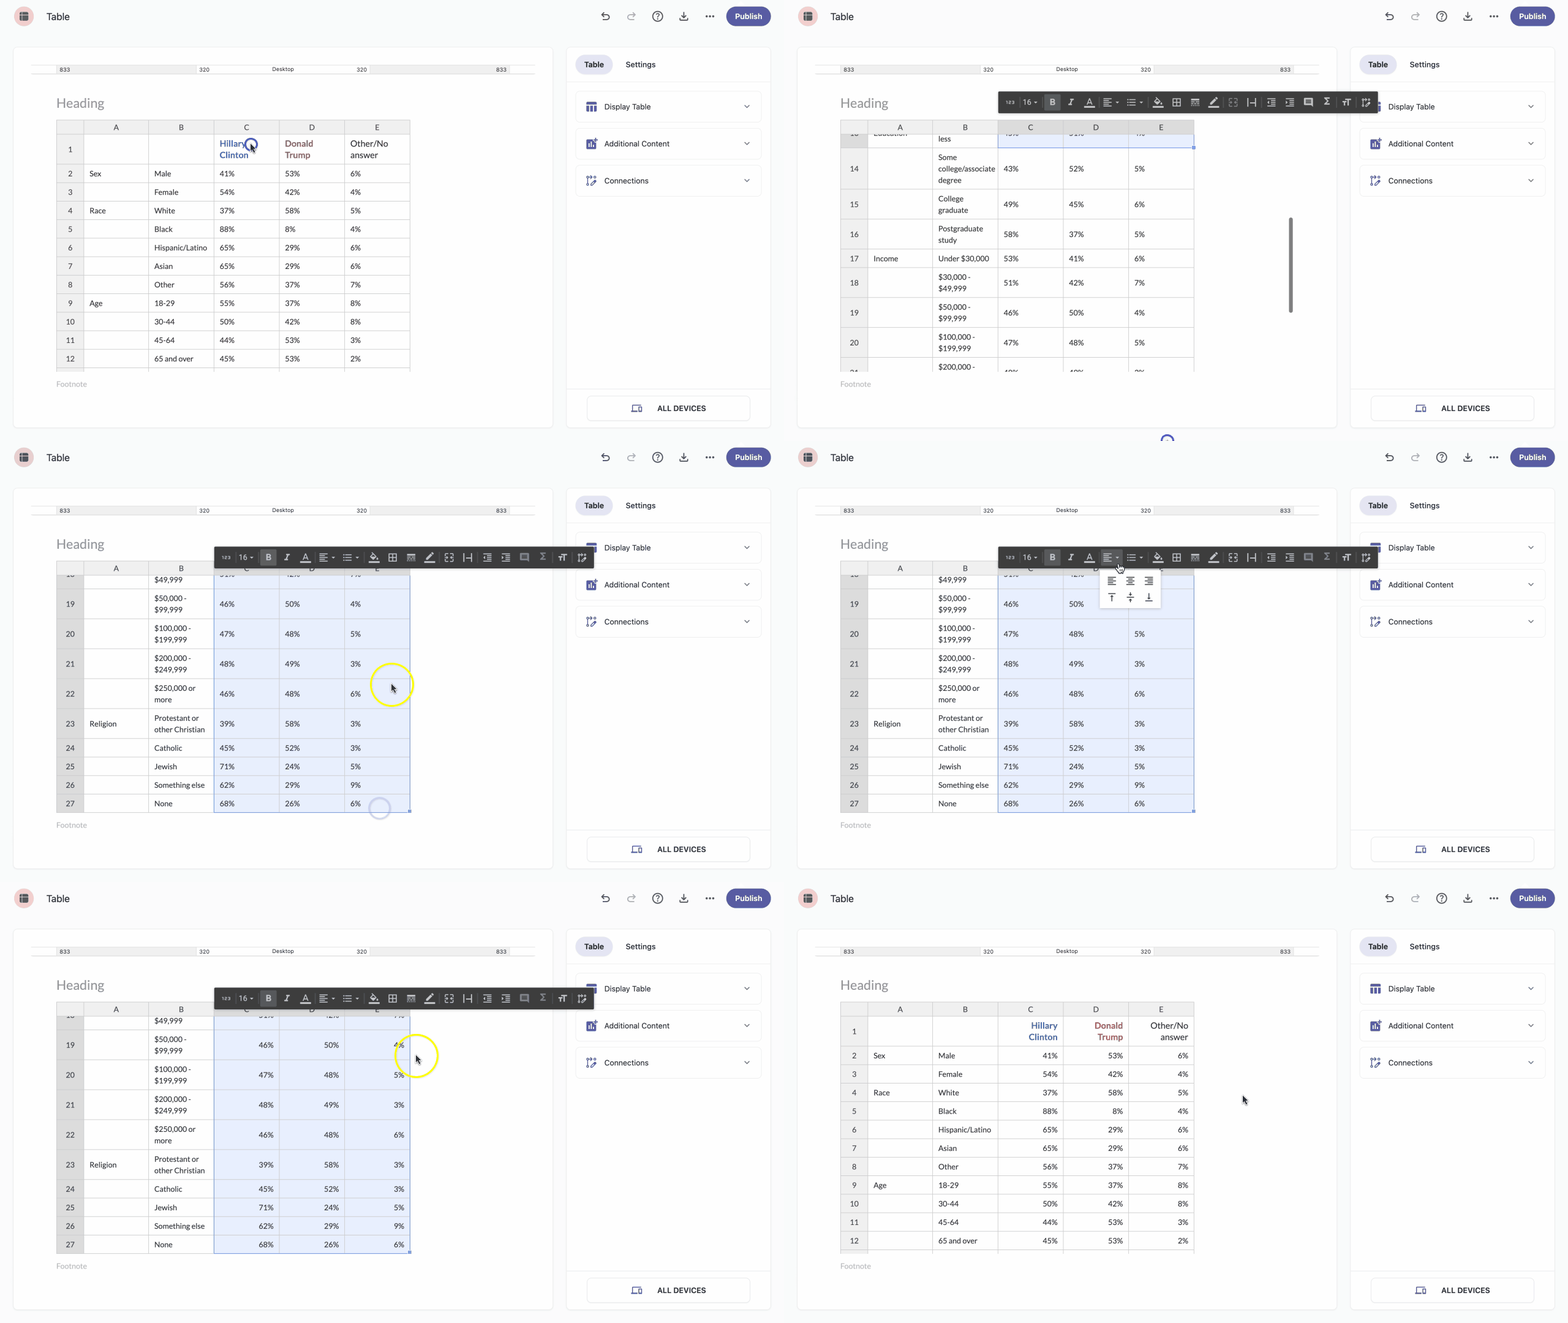
There are six text alignment options:
- Justify left
- Justify center
- Justify right
- Justify top
- Justify middle
- Justify bottom
- Select the data you want to align.
- A toolbar will appear above the selected cell(s).
- Click the Align option.
- A dropdown list will appear, letting you choose one of the alignment options.
Create a list
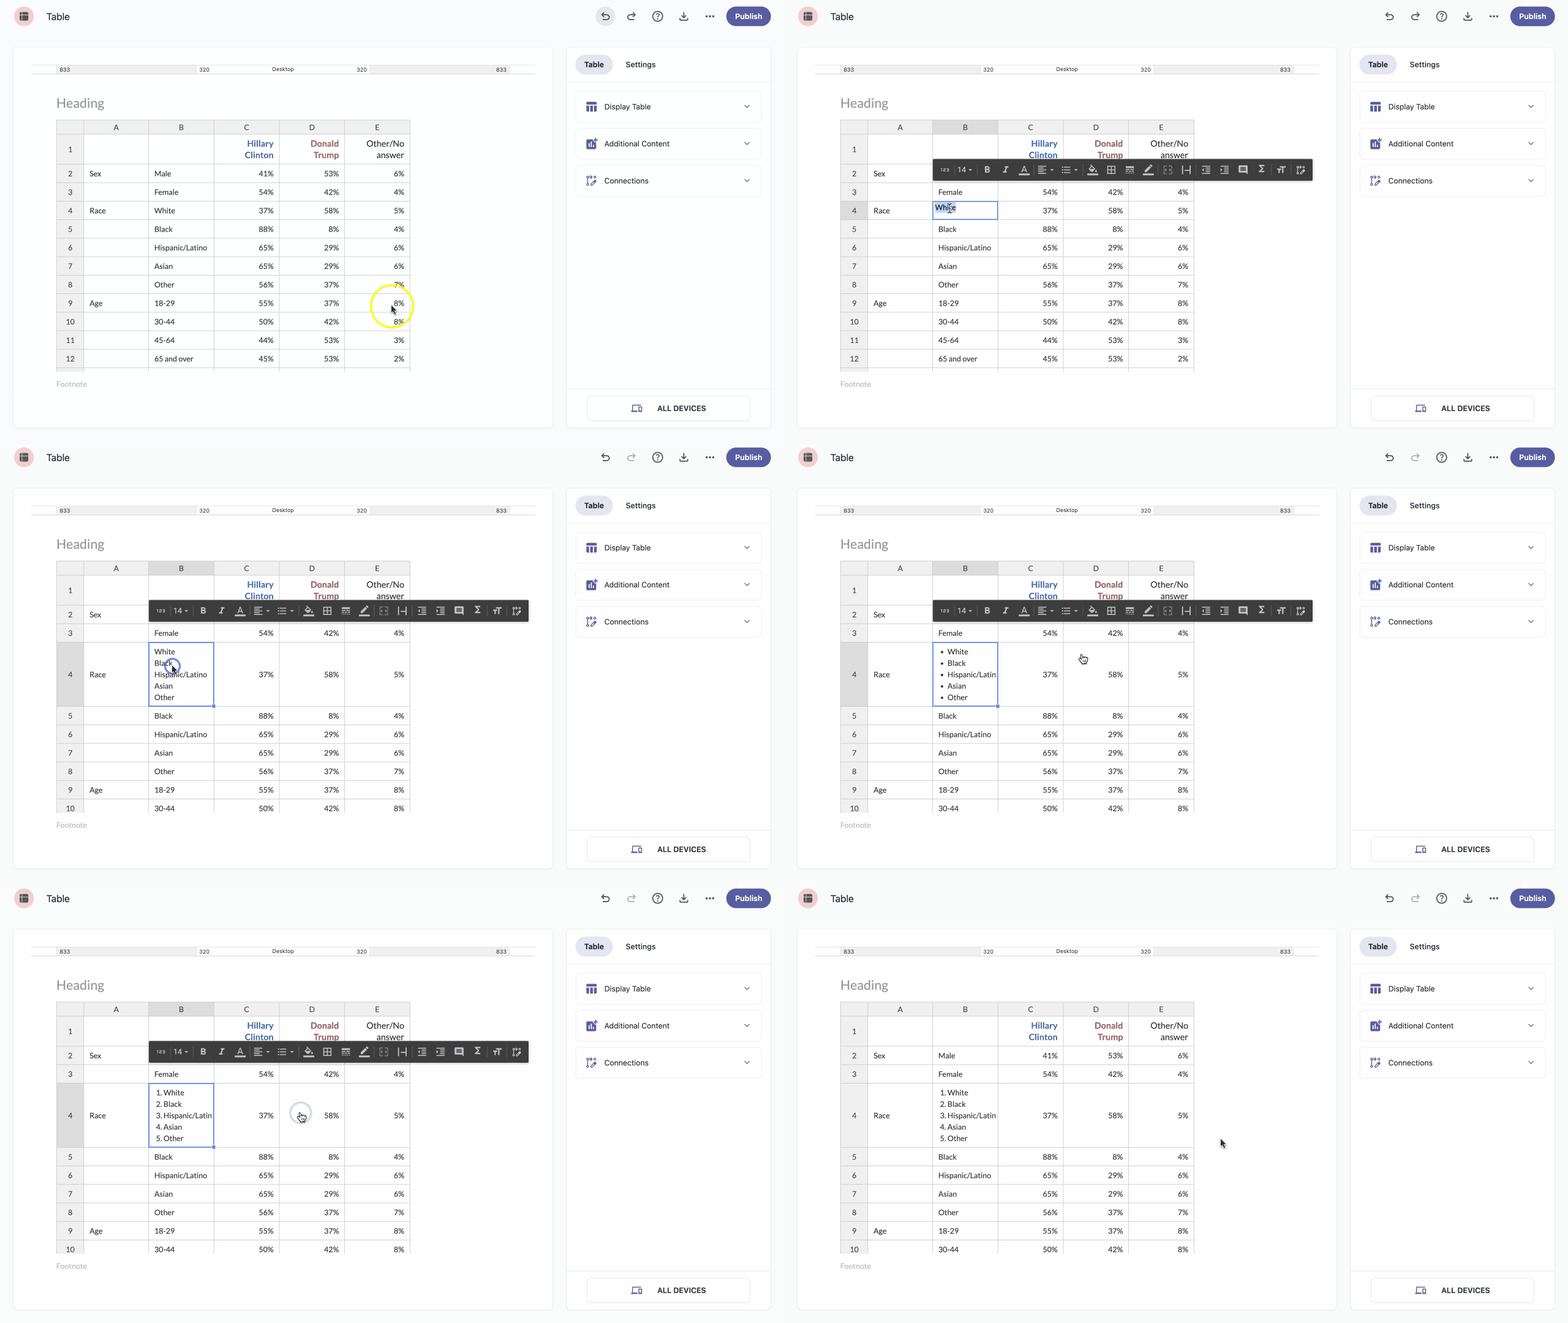
You can add lists inside a cell. Two types are available: bulleted and numbered.
- Select the cell where you want to add a list.
- A toolbar will appear above the selected cell(s).
- Click the List option.
- A dropdown menu will appear, letting you choose the list type.
Add color to a cell
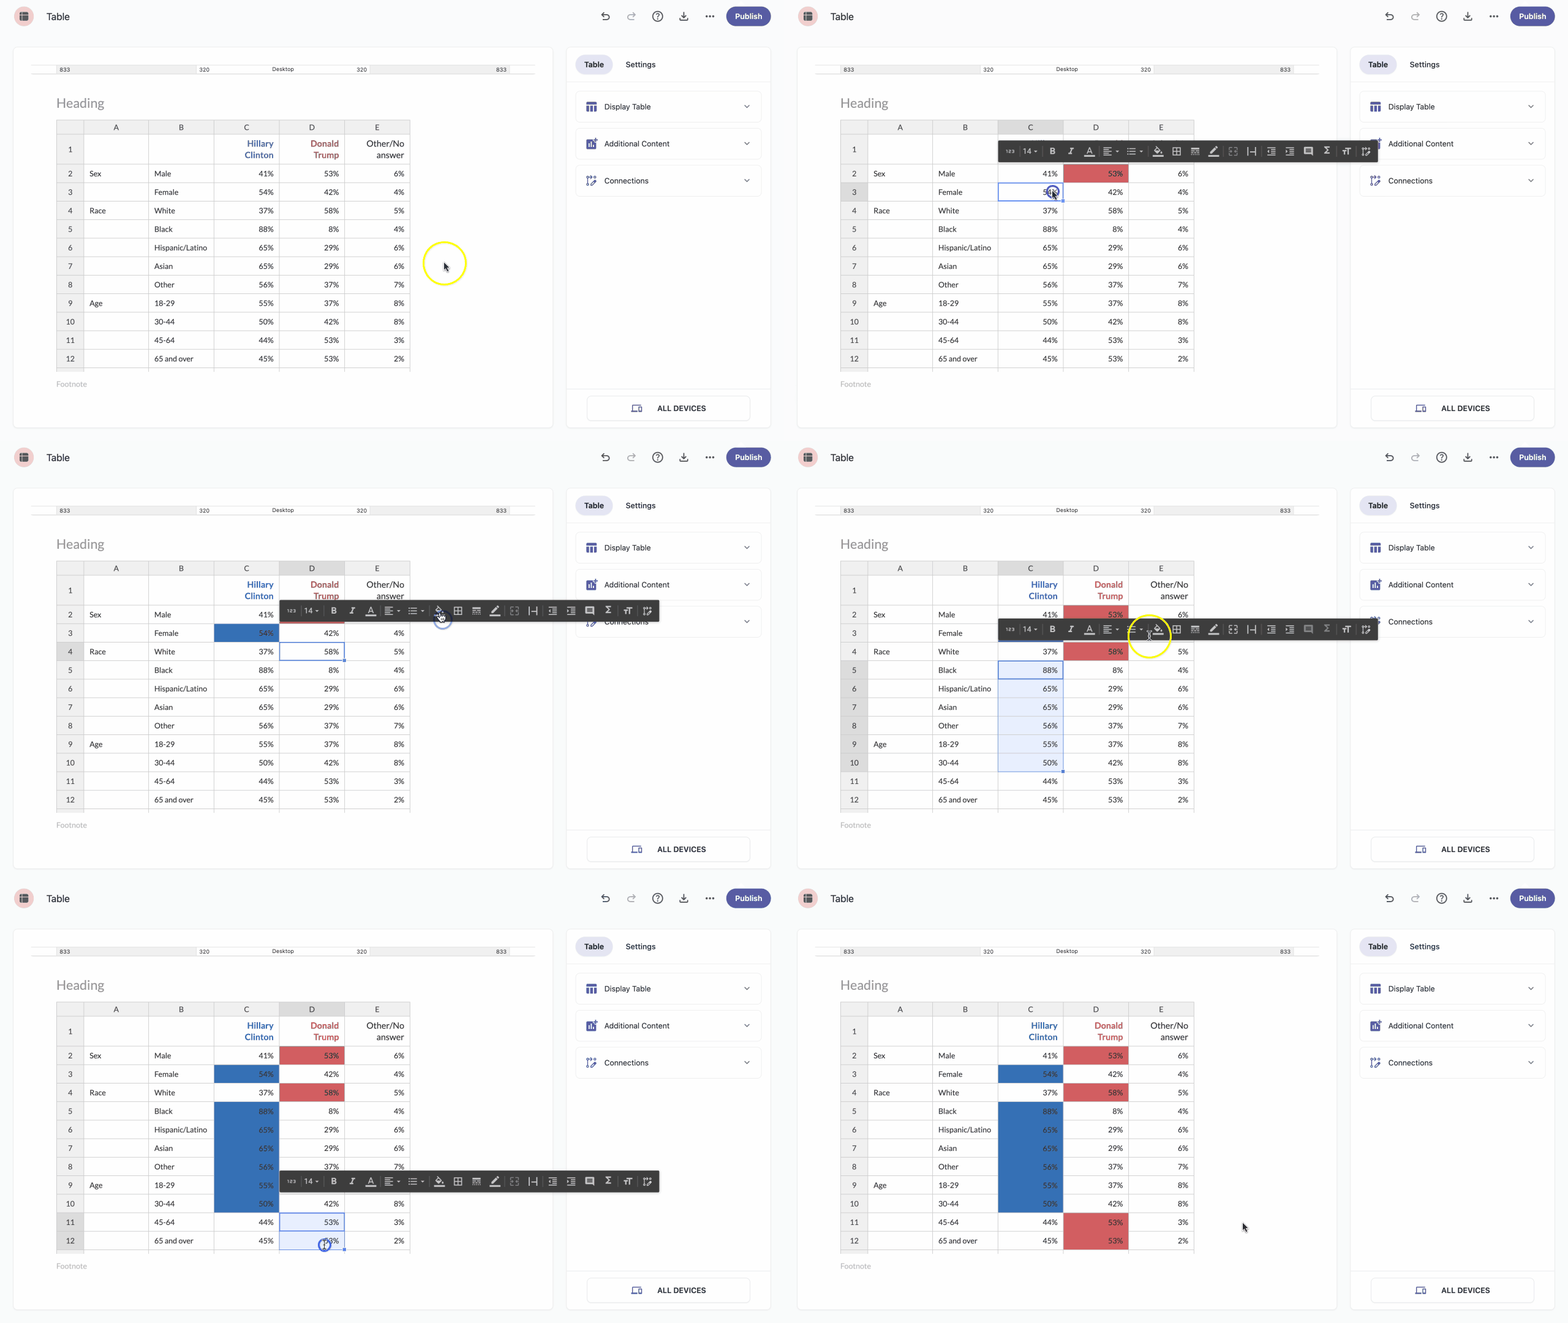
To apply color to a cell, follow these steps:
- Select the cell(s) you want to color.
- A toolbar will appear above the selected cell(s).
- Click the Fill color option.
- Choose a color from the theme, or pick a custom color, and apply it to the cell.
Add borders
You can customize borders using the following toolbar options:
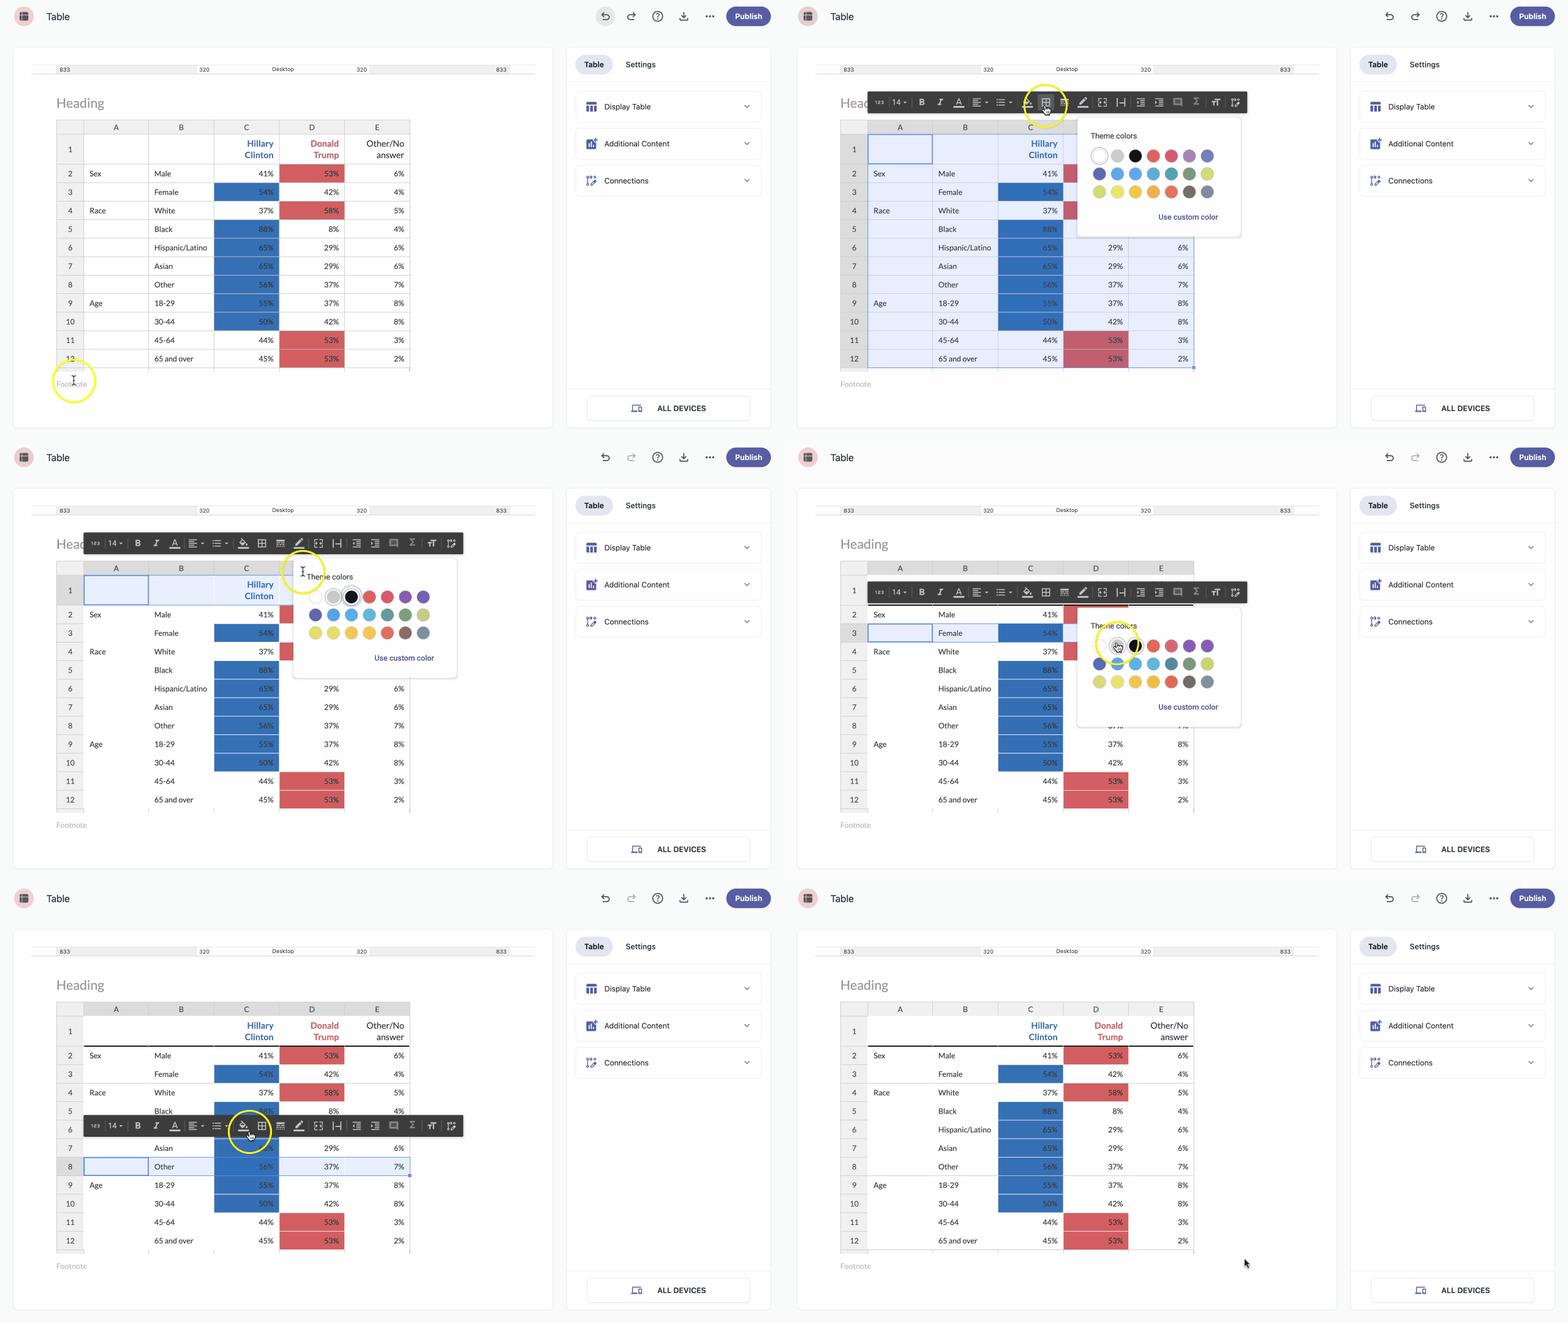
- Border — Opens a dropdown of border options. Choose one and apply it to your cell(s).
- Border style — Adds a style to your border. Choose between thin, medium, thick, or double.
- Border color — Opens the theme colors. Pick one to apply to your border, or click Use custom color in the lower-right corner to define your own.
You can select one or multiple cells at a time and apply these styles.
- Select the cell(s) you want to add borders to.
- A toolbar will appear above the selected cell(s).
- Add borders as described above.
Merge cells
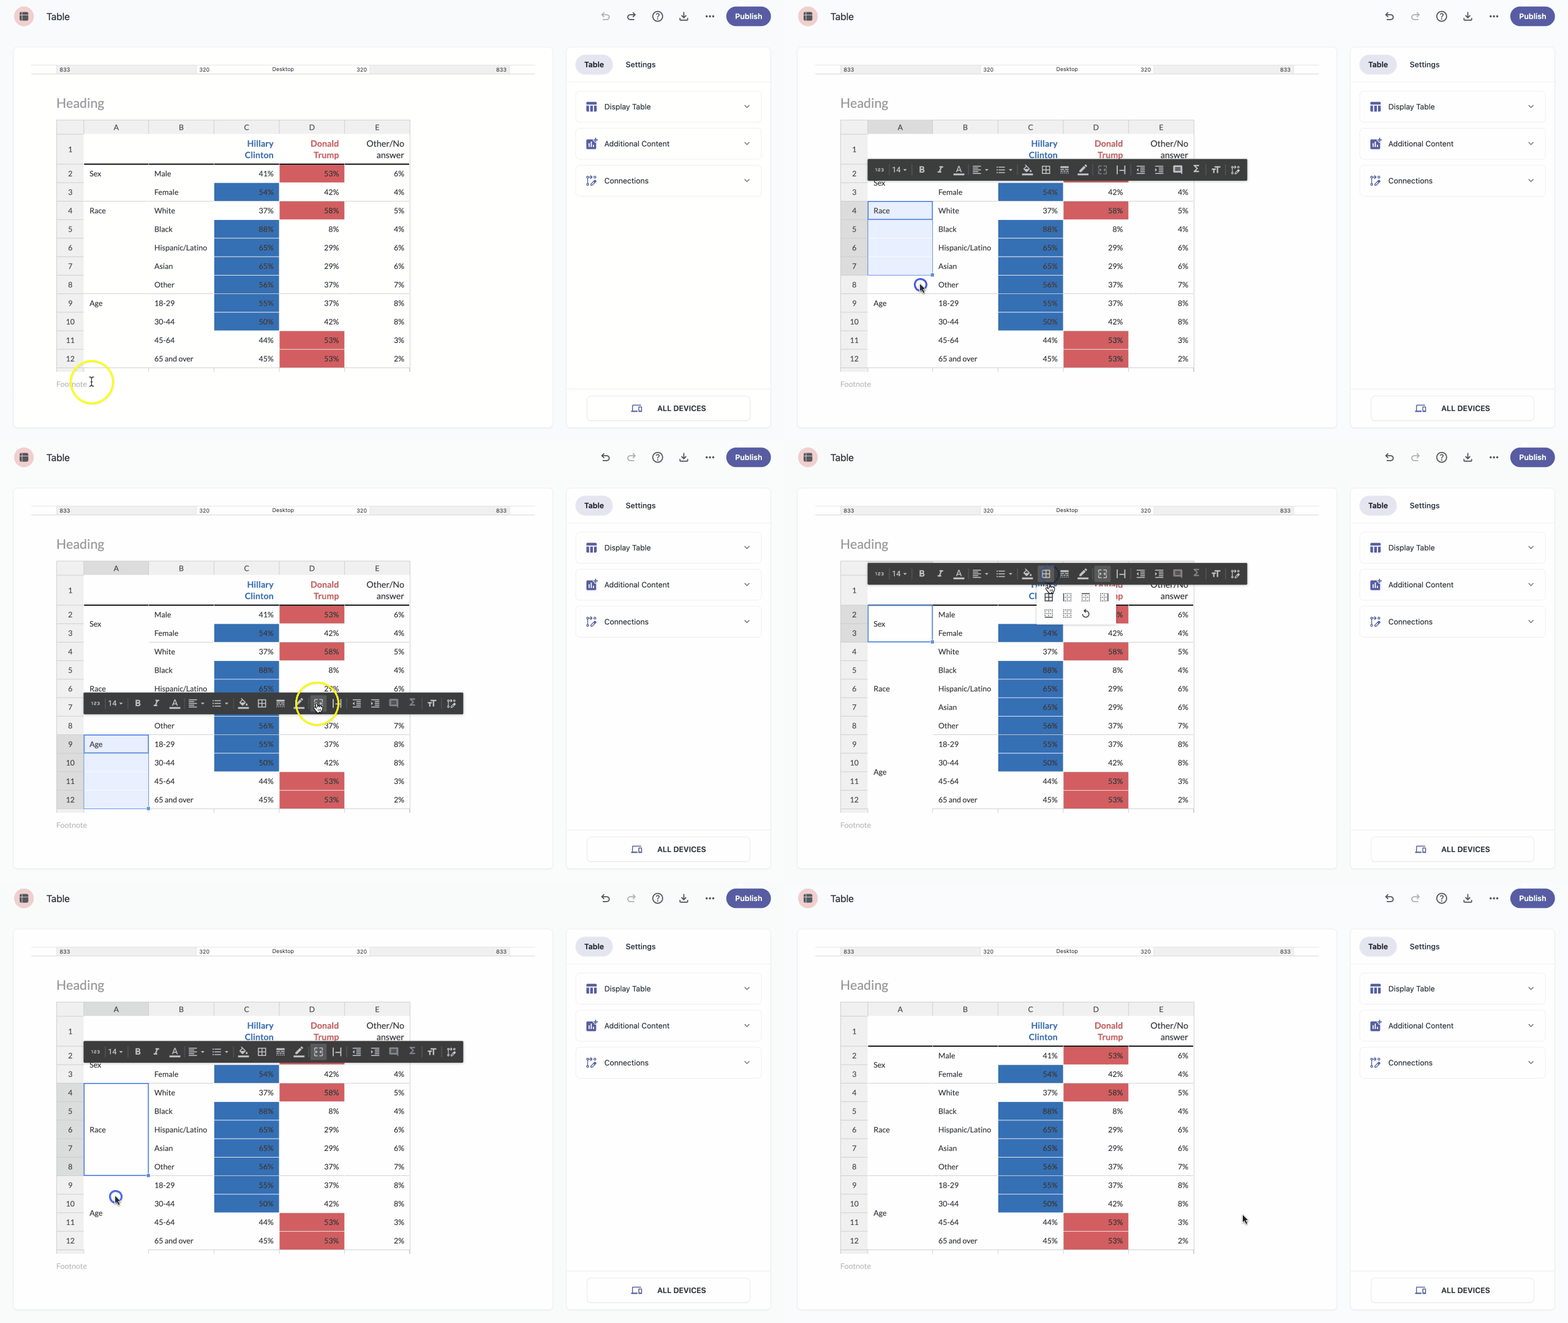
- Select the cells you want to merge.
- A toolbar will appear above the selected cells.
- Click the Merge cells option.
Text clip
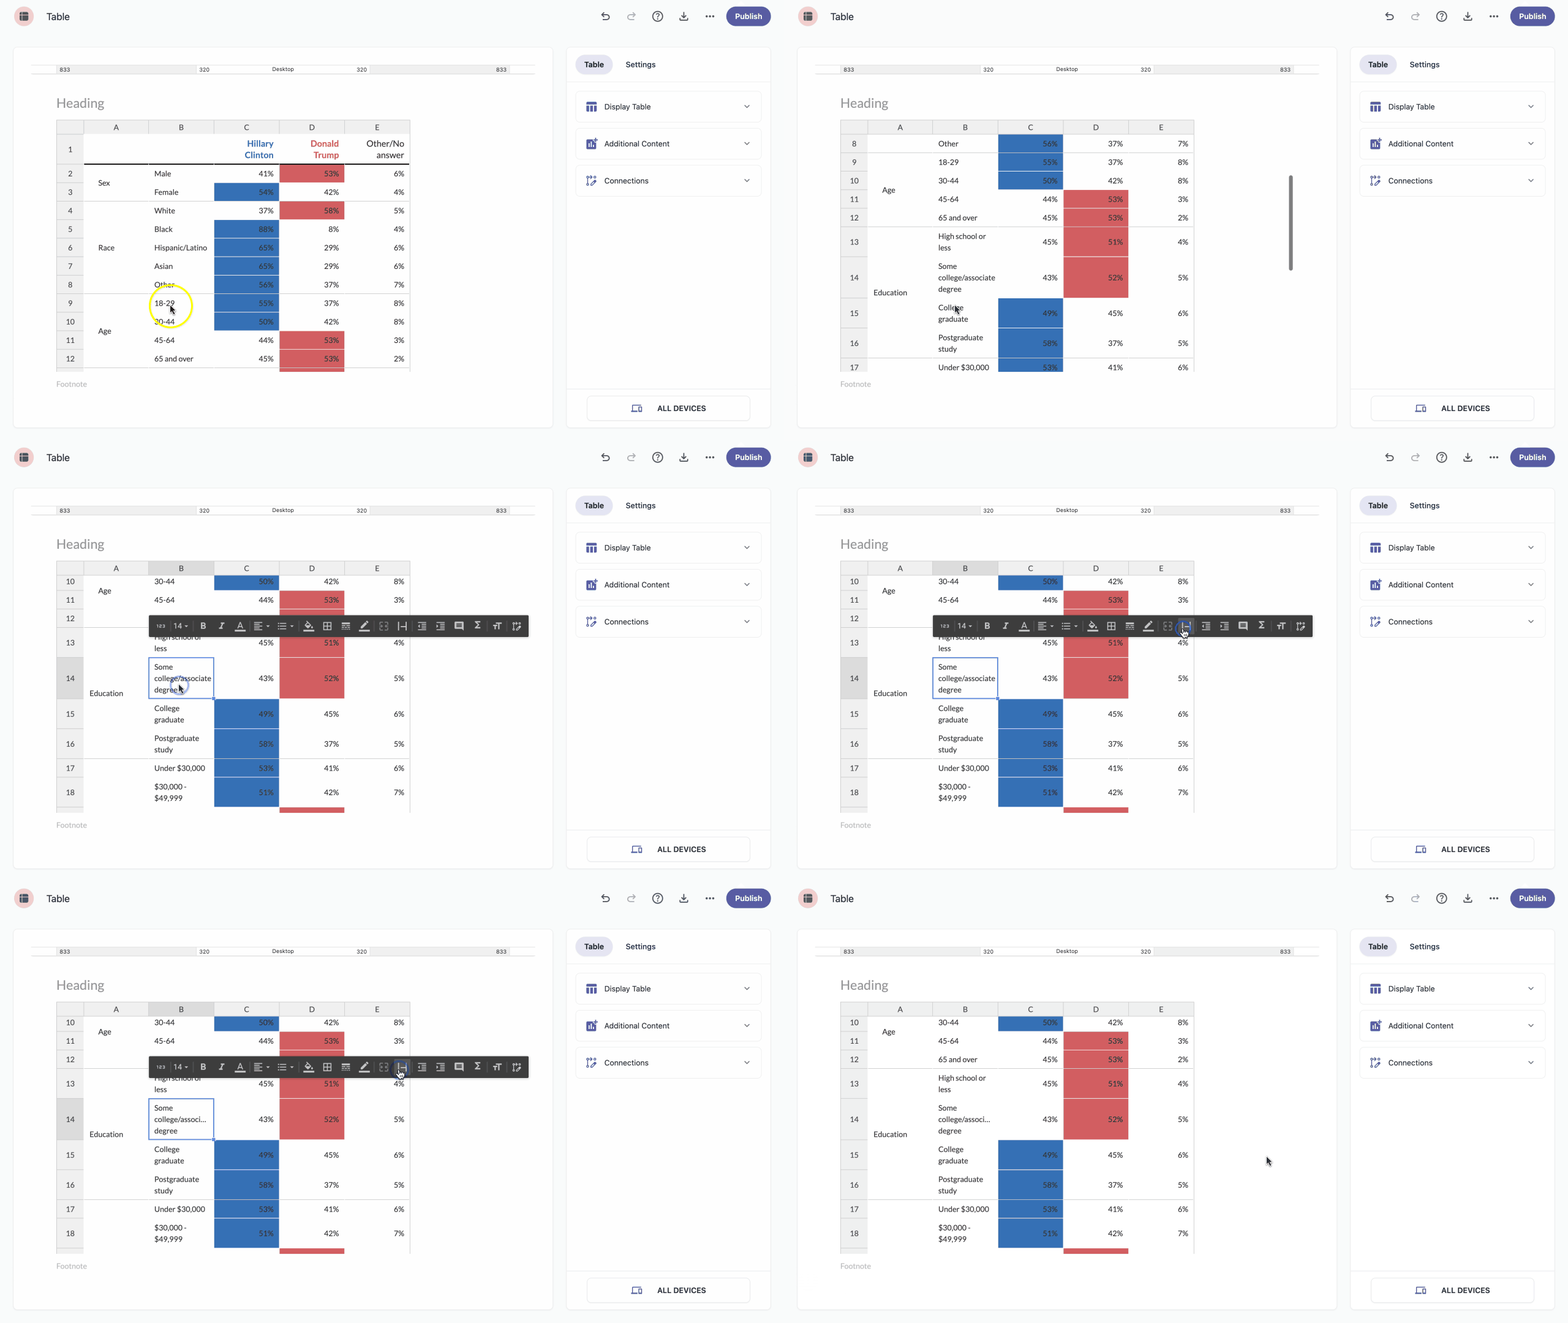
Table automatically adjusts cell height to display all text, but you can clip text to keep cells from expanding.
- Select the cell where you want to clip the text
- A toolbar will appear above the selected cells.
- Click the Text Clip option.
Indents
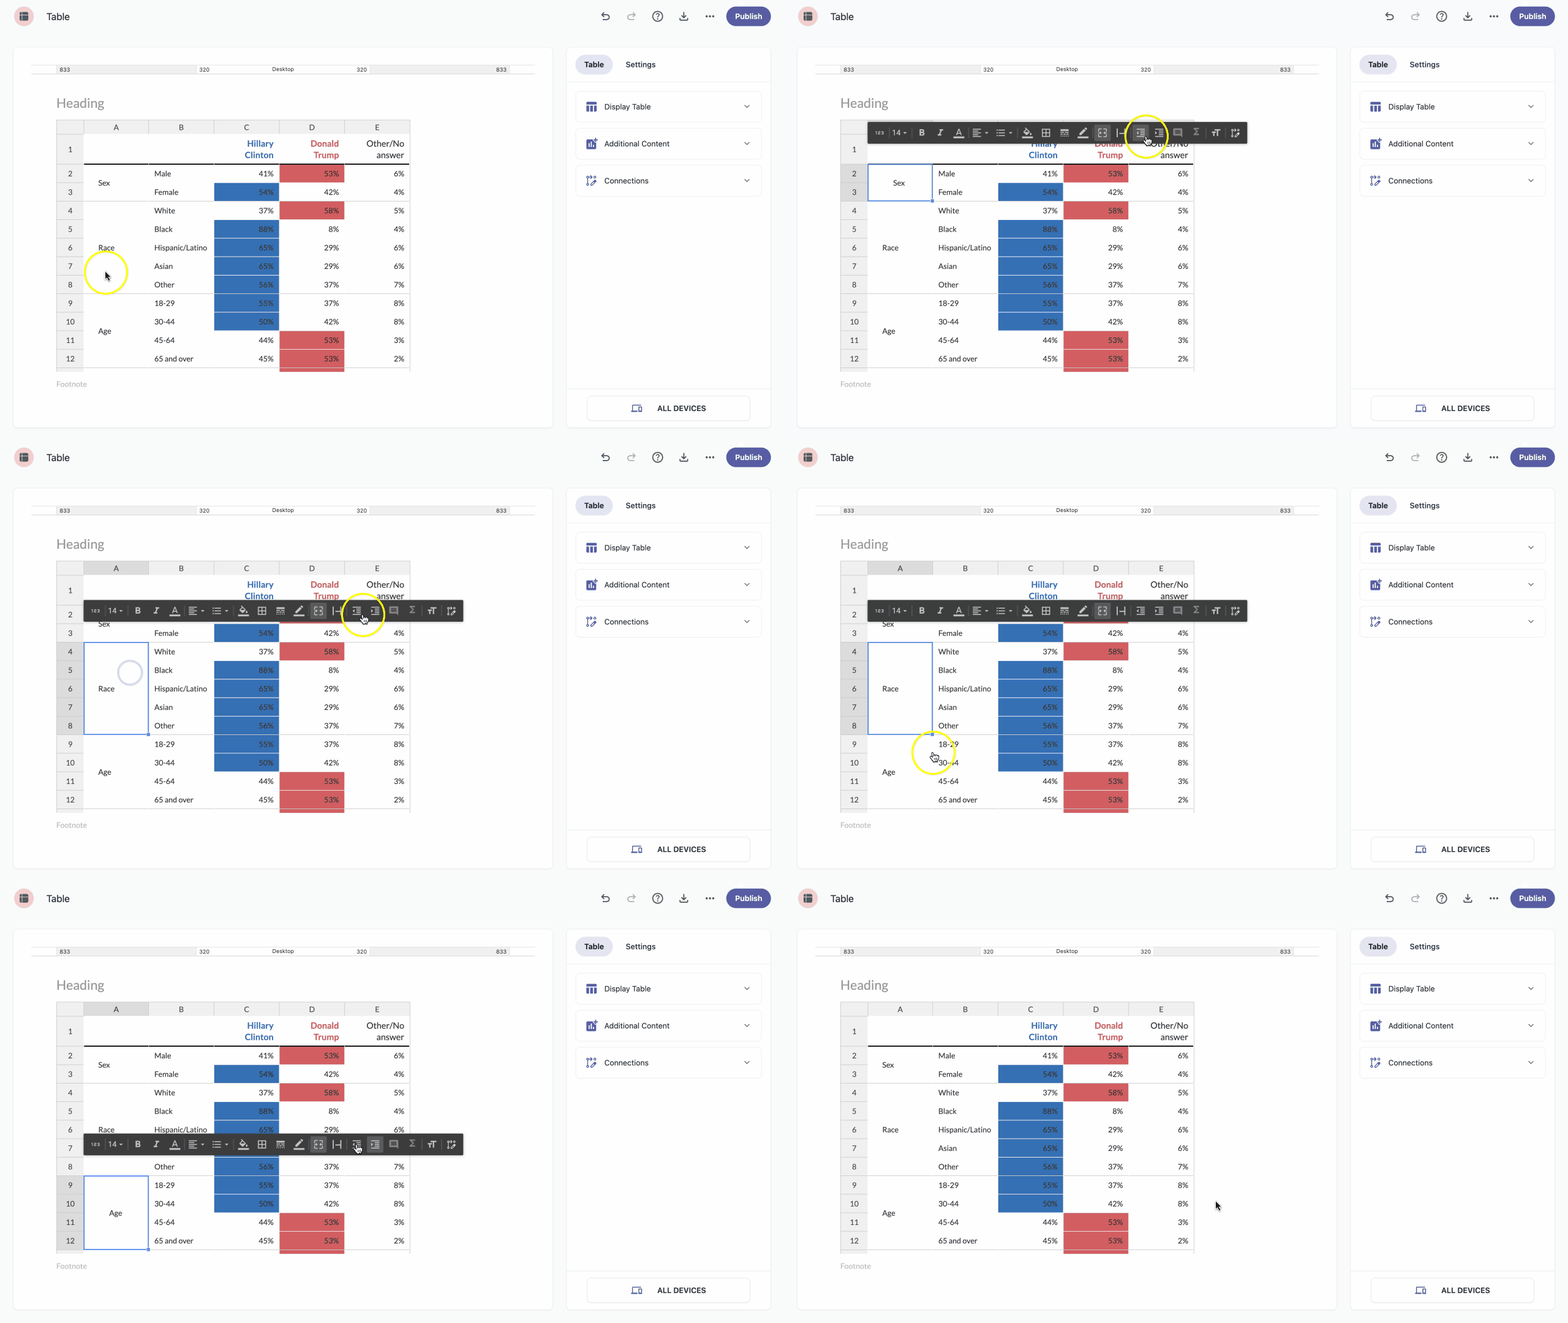
Indent decrease moves your text to the left; Indent increase moves it to the right.
- Select the cells you want to indent.
- A toolbar will appear above the selected cell(s).
- Click the Indent decrease or Indent increase option.
Cell description
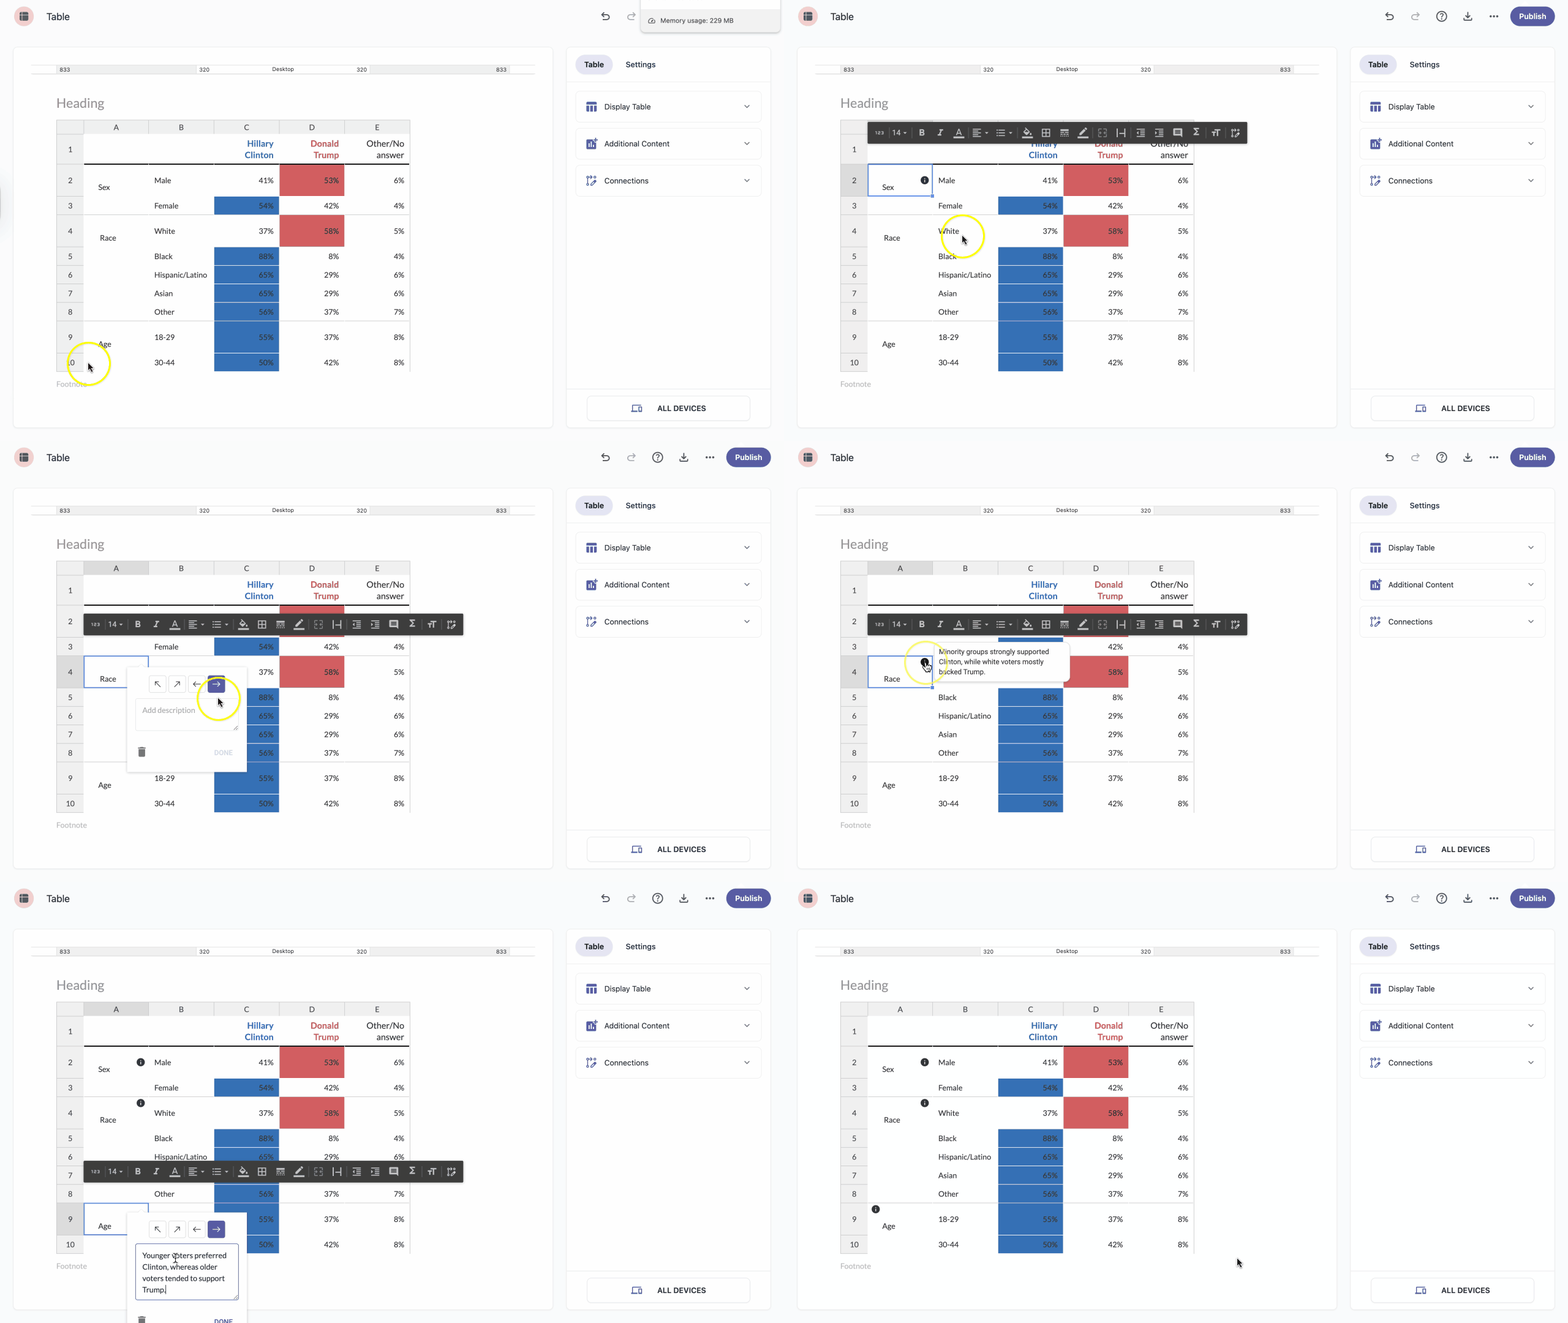
A tooltip displays additional information when the user moves the mouse pointer over an element.
- Select the cells you want to add a description to.
- A toolbar will appear above the selected cell(s).
- Click the Cell description option.
- Use the arrow keys to position where you want your description to appear in the cell.
- Enter the description and click Done.
| Note: An information icon will be added to the cell, and hovering over it will show a box with the text you specified. |
Math equation
To read more about the Math equation, click here.
Accessible header
This toggle lets you mark a specific cell as a table header cell (<th>) instead of a regular table cell (<td>). The Accessible header improves accessibility on complex tables.
| Note: The Accessible header is visible only on published tables. |
Leader lines
To read more about the Leader lines, click here.